In this post i will discuss steps to install Oracle Applications 11i e-Business Suite version 11.5.10.2.
First we need to create a staging area by unzipping all the zip files to create folders as given below.
- docs
- startCD
- oraDB
- oraAppDB
- oraiAS
- oraApps
Now start rapidwiz from startCD/Disk1/rapidwiz>./rapidwiz location ( don't forget to export DISPLAY parameter to valid x-server)
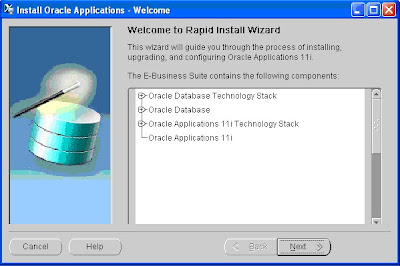
First screen of installer will show you the list of components Rapidwiz will install as a part of Oracle applications 11i Installation. Click next to go the next screen.

In the second screen you will have a choice to install a fresh Oracle Applications E-Business 11i or Upgrade to E-Business 11i from previous versions.

In this screen you can specify Configuration file to use in Multi node Architecture, but if this is the first server in multinode architecture then select 'No'.

In this screen you will get the option to select single node installation or Multinode installation. Based on your requirement please select the option.

In this screen you can select Load balancing option if you have multiple Application tier like two or more Web tiers and two or more Admin Tier servers.

In this screen please specify server name or Node name and Operating system for each Service like database, admin, concurrent and forms.
If you are planning to use Shared File system please configure shared file system option in the screen only by clicking details button otherwise uncheck shared file system option.

In this screen you need to specify the purpose of this instance. You can select Vision Demo Instance or you can select custom instance for your production,development or test purpose.

In this screen you need to specify Oracle Database owner, group and file system (Mount points) architecture for binary files and database files.

In this screen you need to specify Application Owner like applmgr and File System Architecture for all Application services. You can select single owner for database and Application if you are planning to install Vision instance only.

In this screen please specify Domain Name, X-server Address and Port Pool. Based on Port pool number oracle will assign port numbers to different Application services like http, forms,db etc..

If you are planning to use Multinode Architecture then you should save your configuration in some file which you will be using during other node installation.


No comments:
Post a Comment